บทที่ 3 — Working directory และโหมดการรัน
thClaws ยึดตัวเองไว้กับ directory เดียว tool ทุกตัวที่เกี่ยวกับไฟล์ —
read, write, edit, glob, grep, bash — จะถูกจำกัดให้อยู่ภายใน directory
นั้นและ descendant ของมันเท่านั้น เลือกให้ดี หากกว้างเกินไป (เช่น /)
จะเสียประโยชน์ของ sandbox ไป แต่ถ้าแคบเกินไป agent ก็จะมองไม่เห็นสิ่ง
ที่ต้องใช้
ตั้งค่าครั้งแรกที่เปิดใช้
การเปิด desktop GUI ครั้งแรกจะพาคุณผ่าน modal สองตัวตามลำดับ ก่อน
ปล่อยเข้าสู่หน้าต่างหลัก ส่วนการเปิดครั้งถัด ๆ ไป ระบบจะข้าม modal ตัว
ที่สองให้ เพราะได้จำตัวเลือก keychain / .env ของคุณไว้แล้ว
1. เลือก working directory
ทุกครั้งที่เปิด (ไม่ใช่แค่ครั้งแรก) จะมี modal ถามว่าอยากให้ thClaws
ยึดรากไว้ที่ไหน โดยช่องจะถูกกรอกล่วงหน้าด้วย cwd ปัจจุบัน พร้อม
แสดงสาม directory ล่าสุดที่คุณเคยเลือกไว้
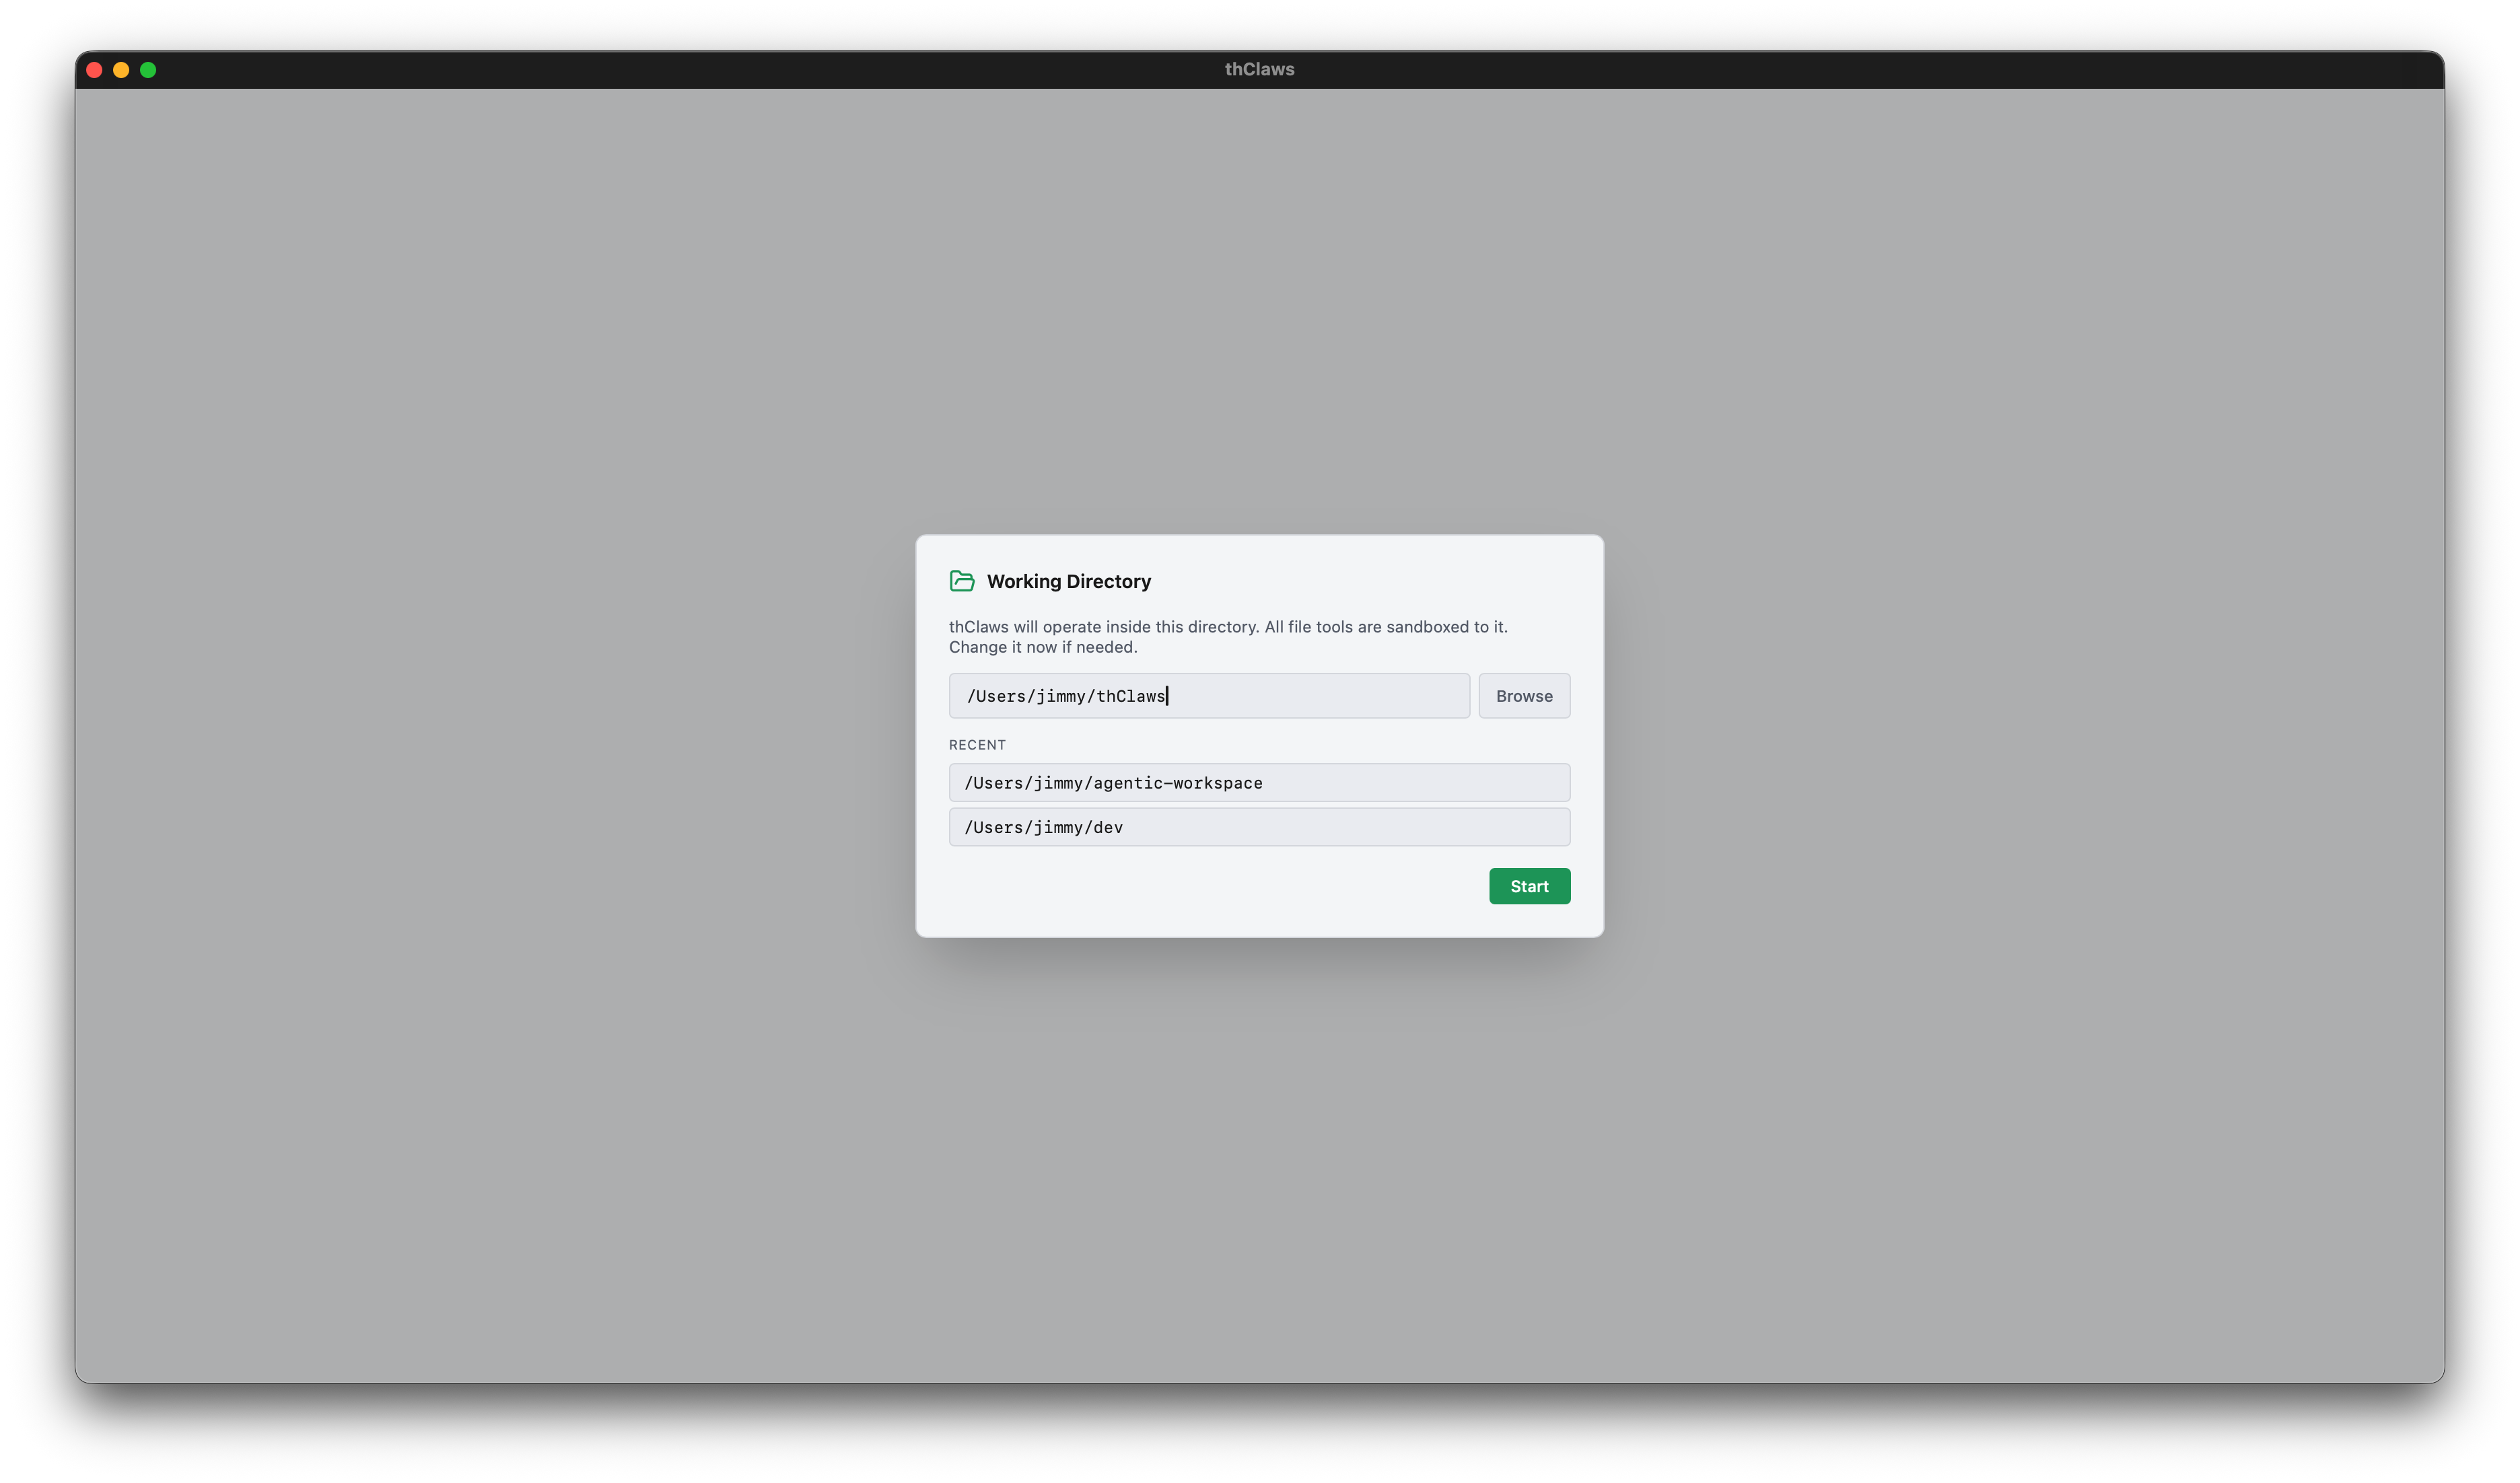
เลือกได้สามวิธี:
- พิมพ์ path ลงในช่องข้อความ
- รายการทางลัด Recent directories (เก็บใน
~/.config/thclaws/recent_dirs.json) - Browse… เปิดตัวเลือก folder แบบ native ของ OS (macOS ใช้
osascript, Linux ใช้zenity, Windows ใช้ dialog ของ PowerShell)
เลือกอย่างใดอย่างหนึ่งแล้วคลิก Start แอปจะตั้งรากของ sandbox แล้ว spawn PTY ของ REPL ให้
2. จะให้ thClaws เก็บ API key ไว้ที่ไหน?
เฉพาะการเปิดใช้ครั้งแรกเท่านั้น หลังจากเลือก working directory
เสร็จ จะมี dialog ที่สองขึ้นมาถามว่าอยากเก็บ API key ของ LLM ไว้ที่ไหน
dialog นี้จะรัน ก่อน ที่ thClaws จะไปแตะ keychain ของ OS —
ดังนั้นถ้าเลือก .env ก็จะไม่มี prompt ของ keychain เด้งขึ้นมาเลย
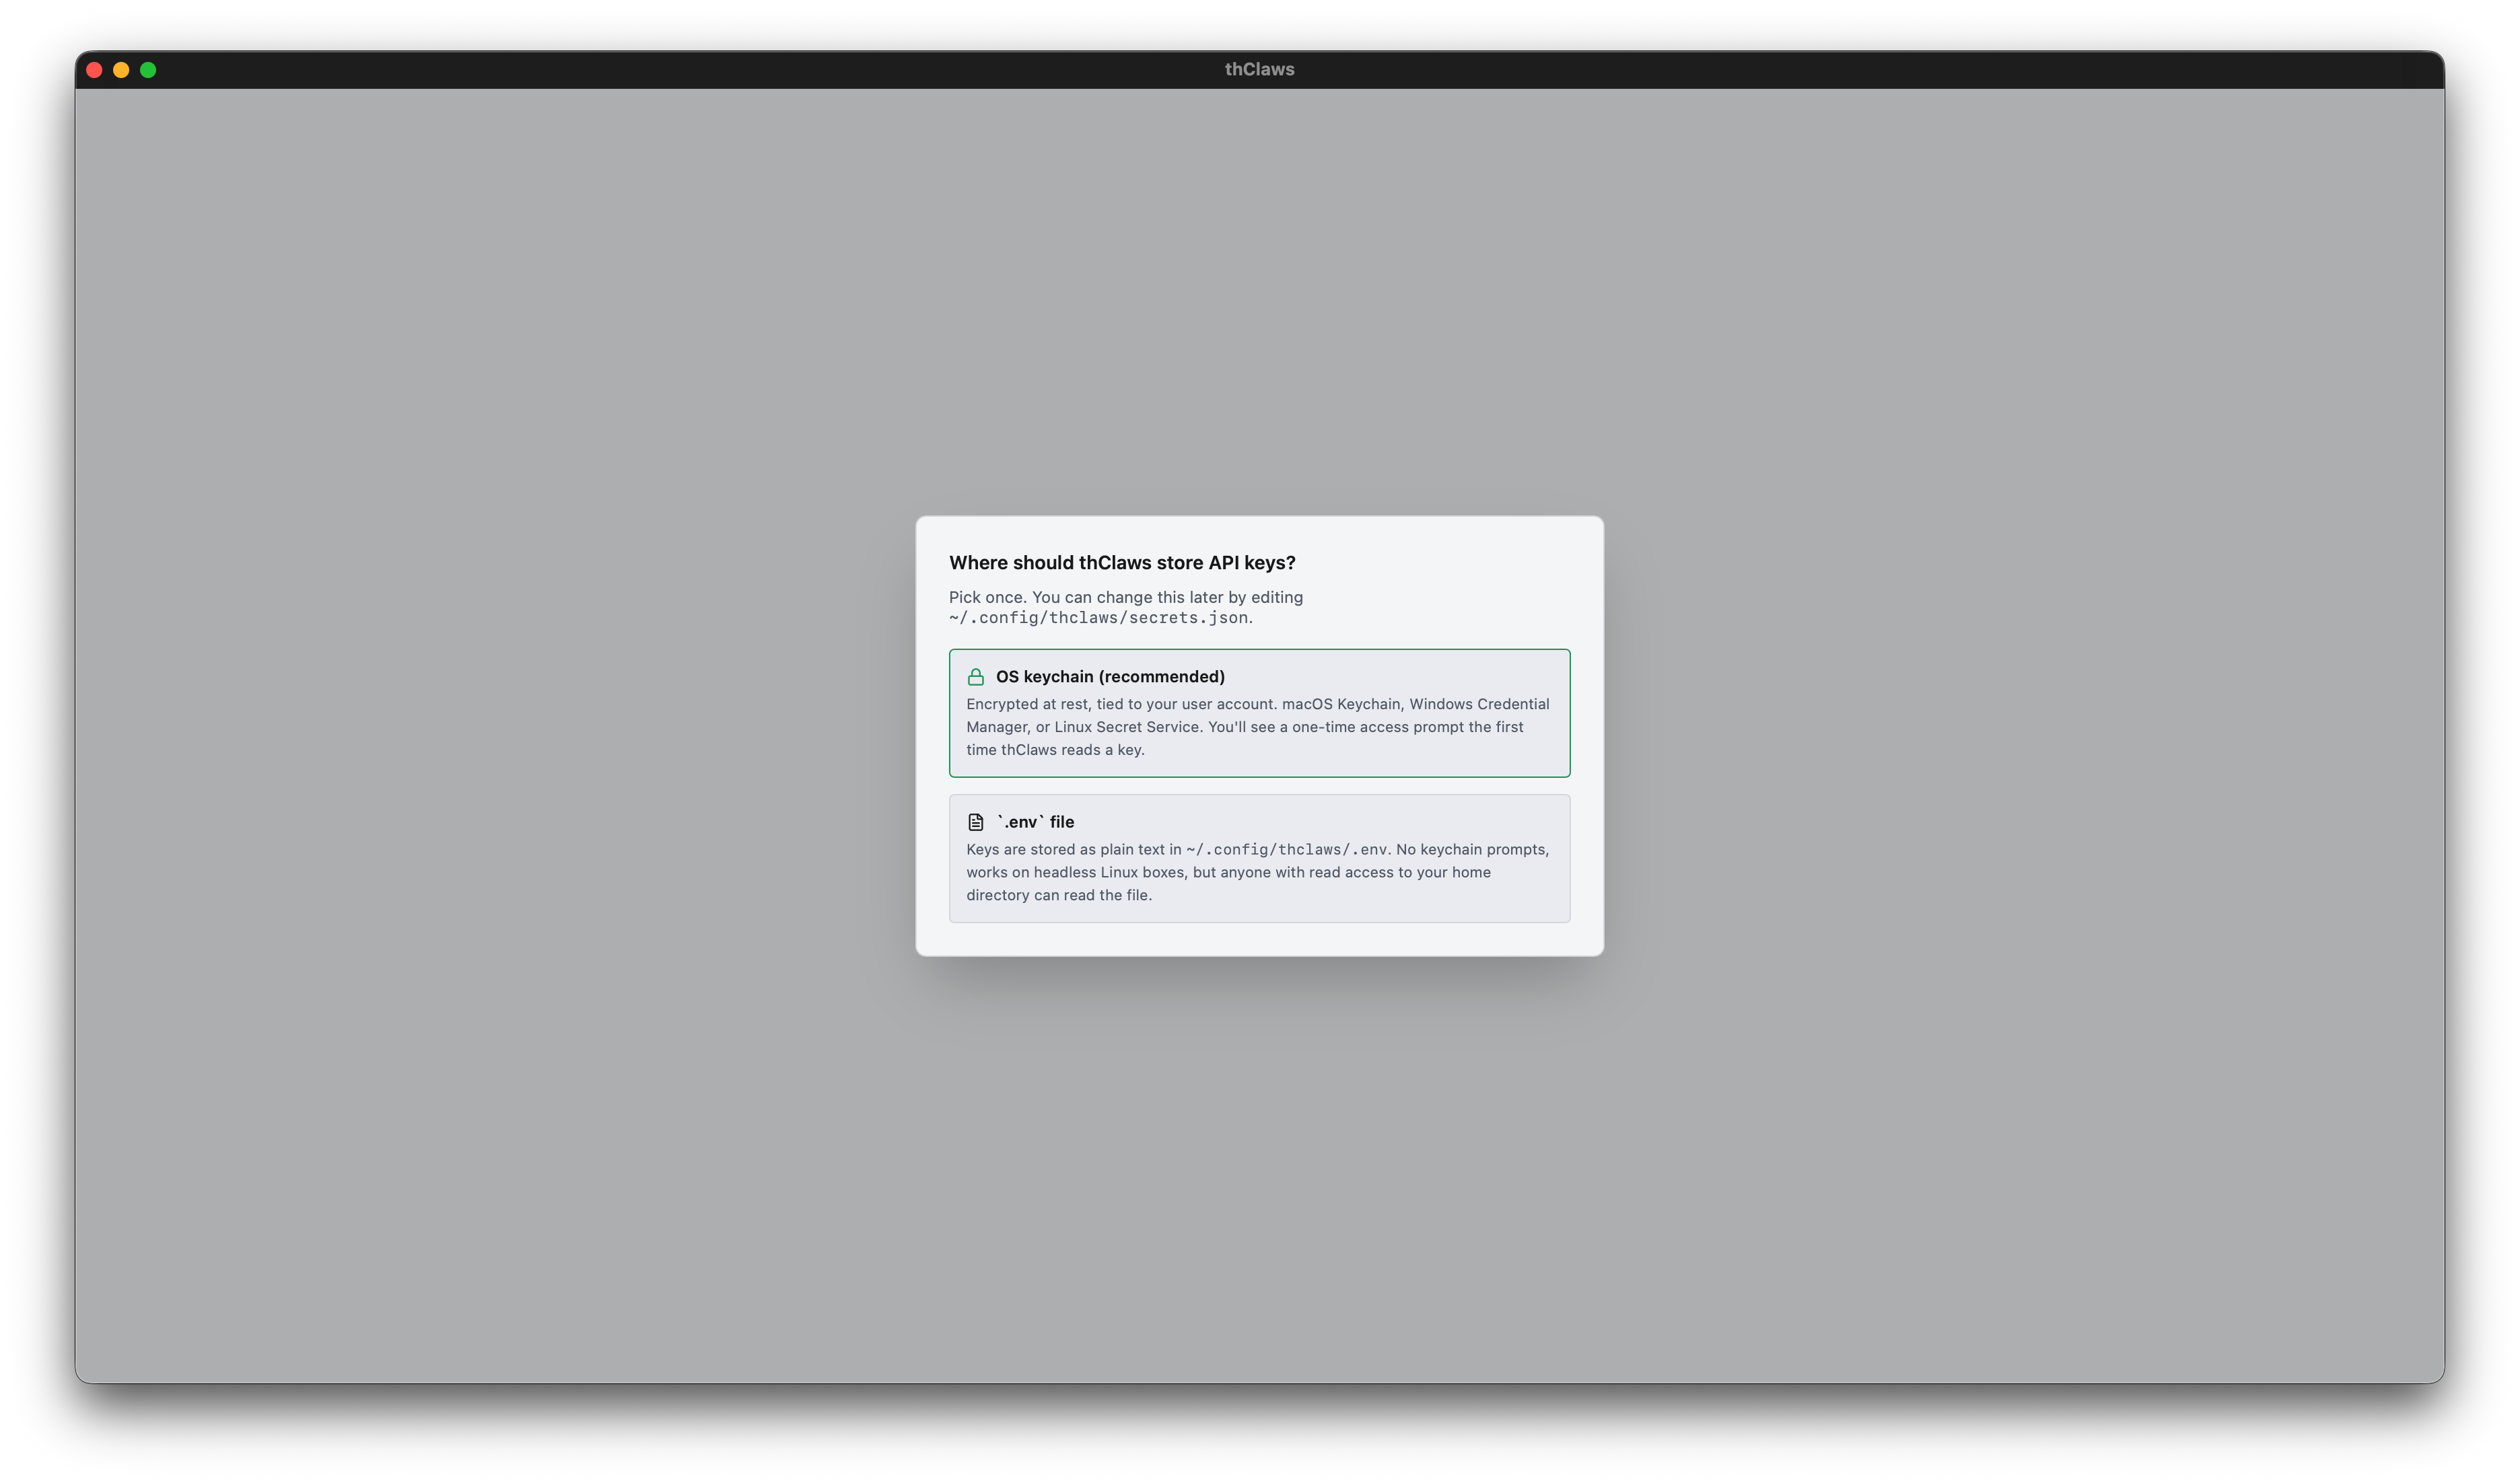
- OS keychain (แนะนำ) — เข้ารหัสและผูกกับ user account ของคุณ (macOS Keychain / Windows Credential Manager / Linux Secret Service) จะมี prompt ขอสิทธิ์จาก OS โผล่ขึ้นมาครั้งเดียวตอนที่ thClaws อ่าน key เป็นครั้งแรก คลิก “Always Allow” แล้วการเปิดครั้ง ถัดไปจะไม่มีการถามอีก ยกเว้นเมื่อมีการอัพเดทเวอร์ชั่นของโปรแกรม
- ไฟล์
.env— เก็บ key เป็นข้อความธรรมดาไว้ที่~/.config/thclaws/.envไม่มี prompt จาก keychain มารบกวน เหมาะกับ เครื่อง Linux แบบ headless ที่ไม่มี Secret Service แต่แลกมาด้วย ความเสี่ยงที่ใครก็ตามที่เข้าถึง home directory ของคุณได้ จะอ่านไฟล์นี้ได้ด้วย
ตัวเลือกของคุณจะถูกบันทึกไว้ที่ ~/.config/thclaws/secrets.json และ
มีผลถาวร หากเปลี่ยนใจภายหลังก็ทำได้ โดยไปที่ Settings → Provider API
keys → “Change…” ระบบจะเปิด chooser ตัวเดียวกันขึ้นมาอีก ดู
บทที่ 6
สำหรับการเปรียบเทียบ trade-off แบบเจาะลึก
CLI และ -p ข้าม modal ของ GUI
โหมด CLI และโหมดไม่โต้ตอบจะไม่แสดง modal — CLI ใช้ directory ที่คุณ
launch มันขึ้นมา ส่วนตัวเลือก backend ของ secret จะอ่านจาก
~/.config/thclaws/secrets.json (หรือใช้ค่าเริ่มต้นเป็น .env ถ้า
ไฟล์ไม่มีอยู่)
cd ~/projects/my-app
thclaws --cli
โหมดการรัน
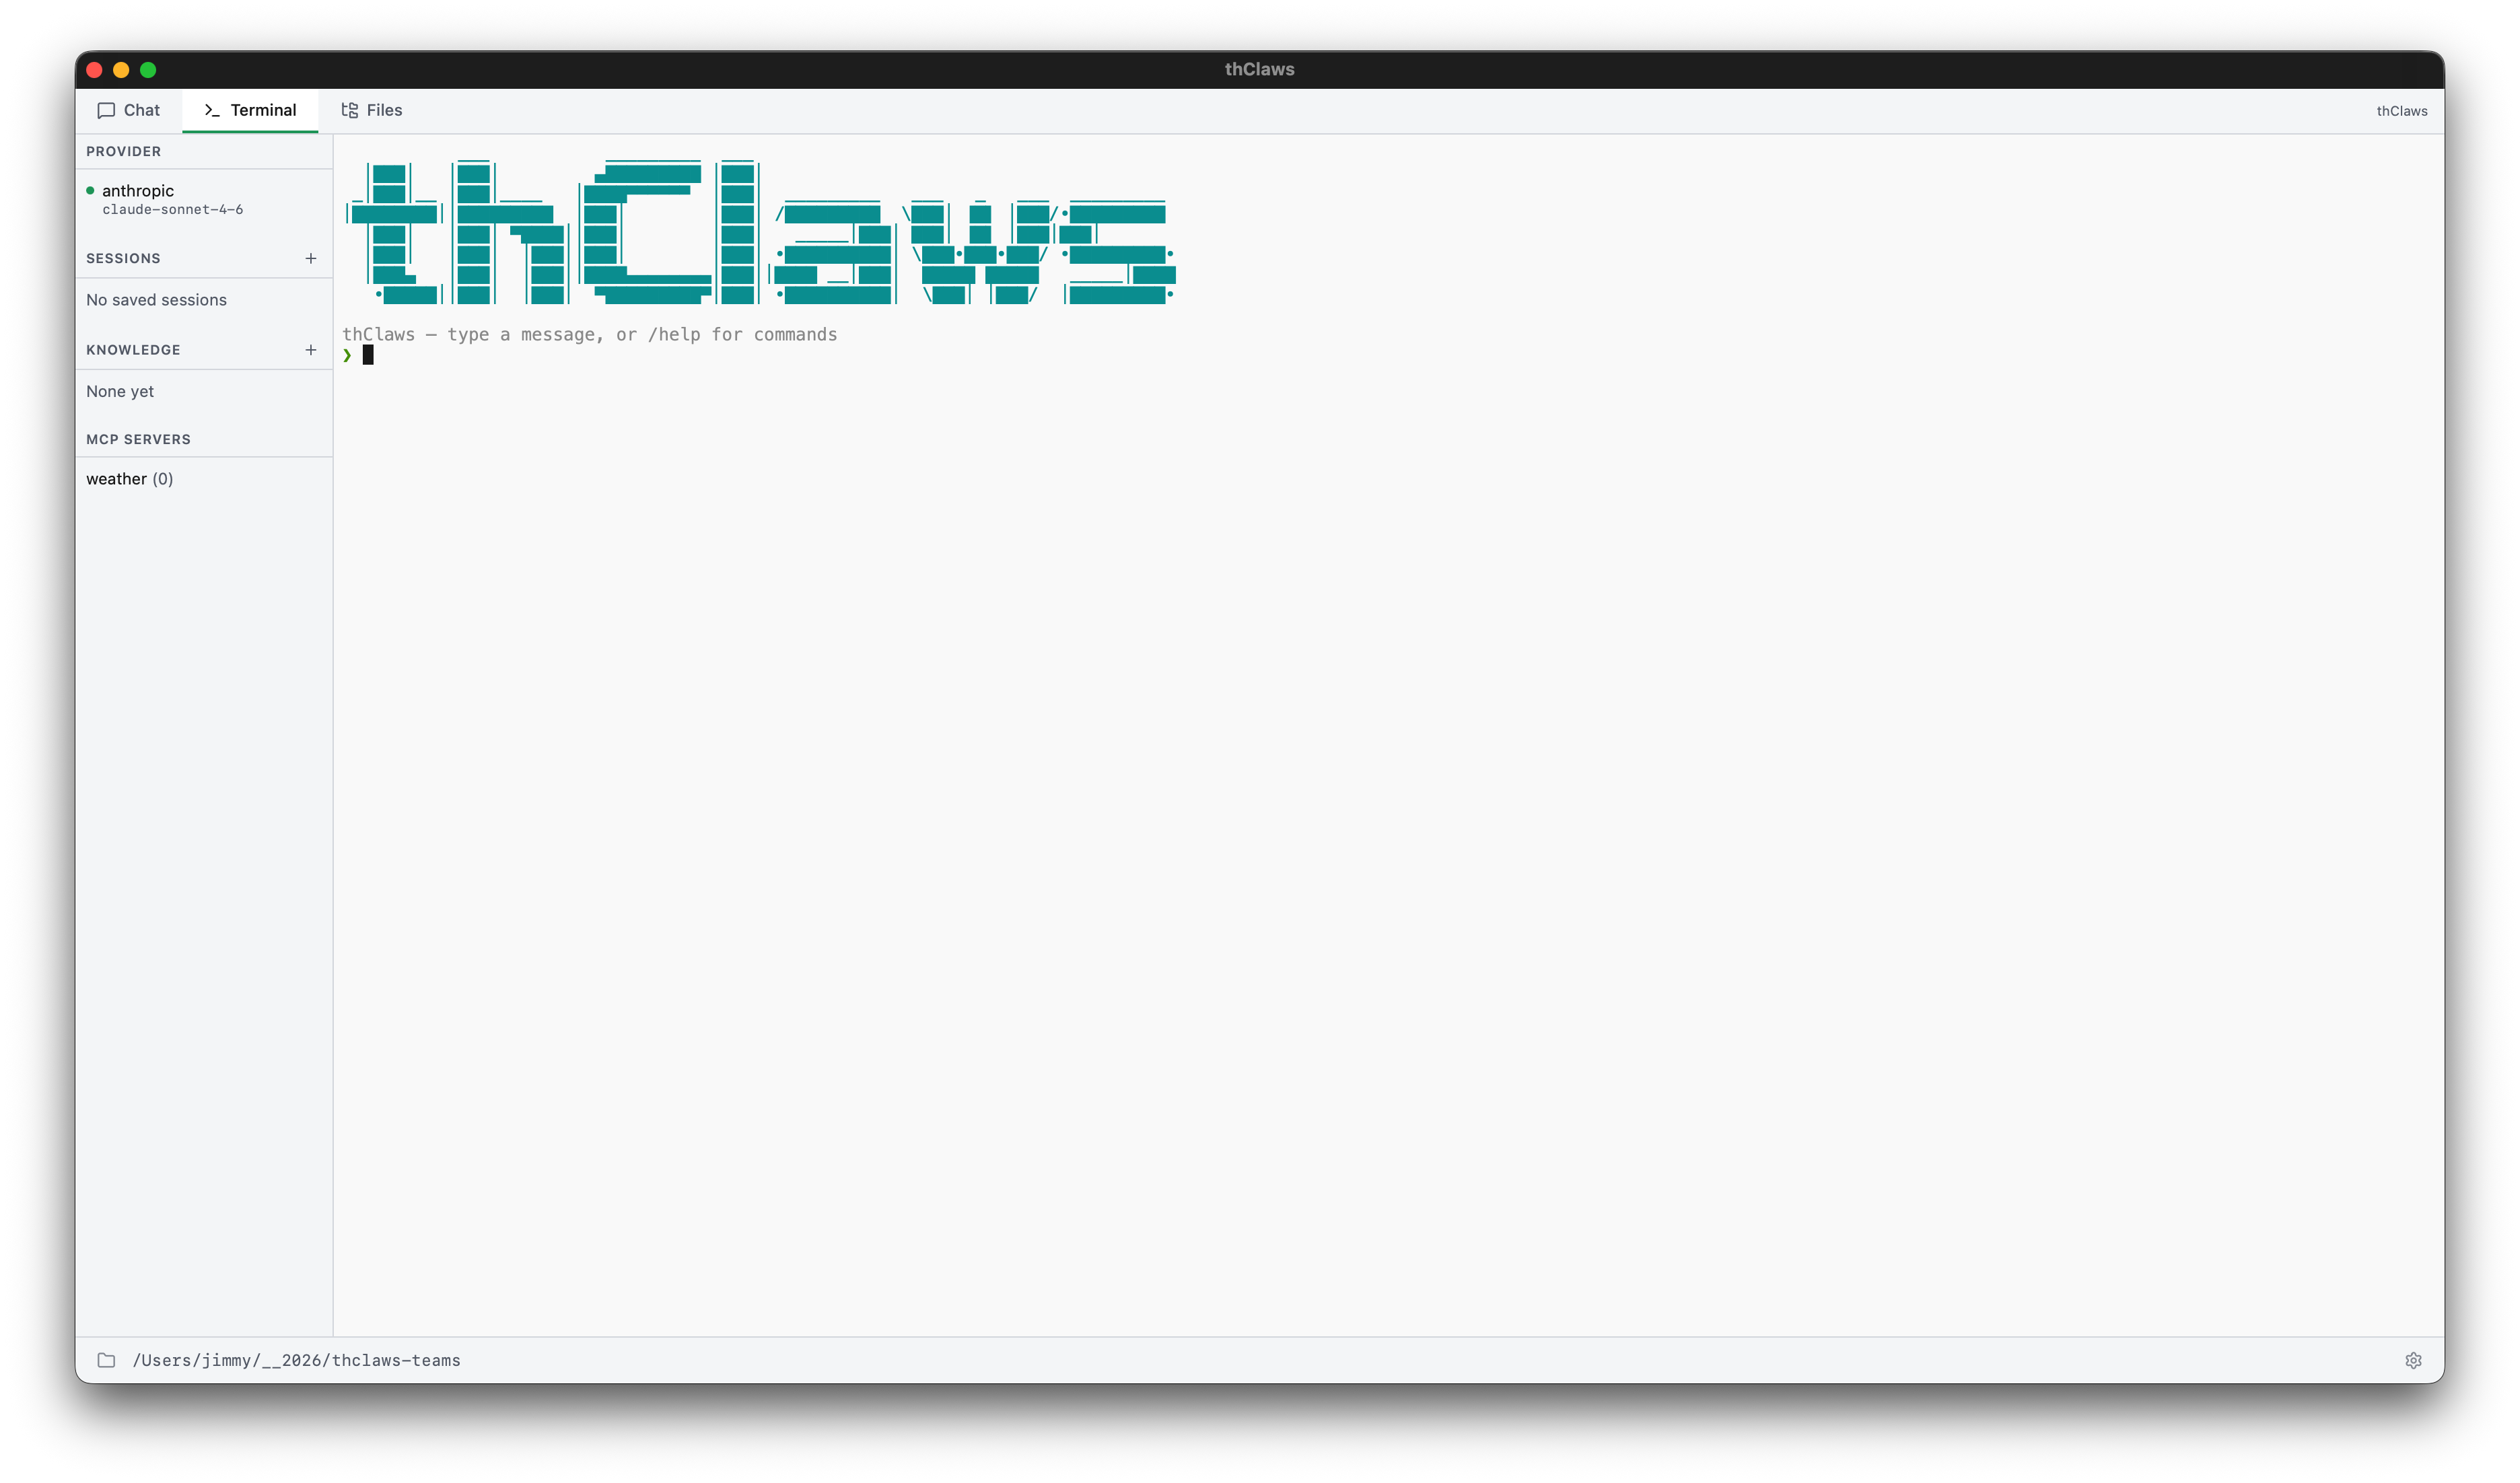
Desktop GUI (ค่าเริ่มต้น)
thclaws
เปิด desktop app แบบ native ซึ่งมีสามแท็บ (Chat, Terminal, Files, Team) พร้อม sidebar แสดงส่วน provider/sessions/knowledge/MCP และมี ไอคอนเฟืองสำหรับ Settings ดูบทที่ 4 สำหรับ ทัวร์ฉบับเต็ม พร้อมภาพหน้าจอและคีย์ลัด
Terminal Tab:
Chat Tab:
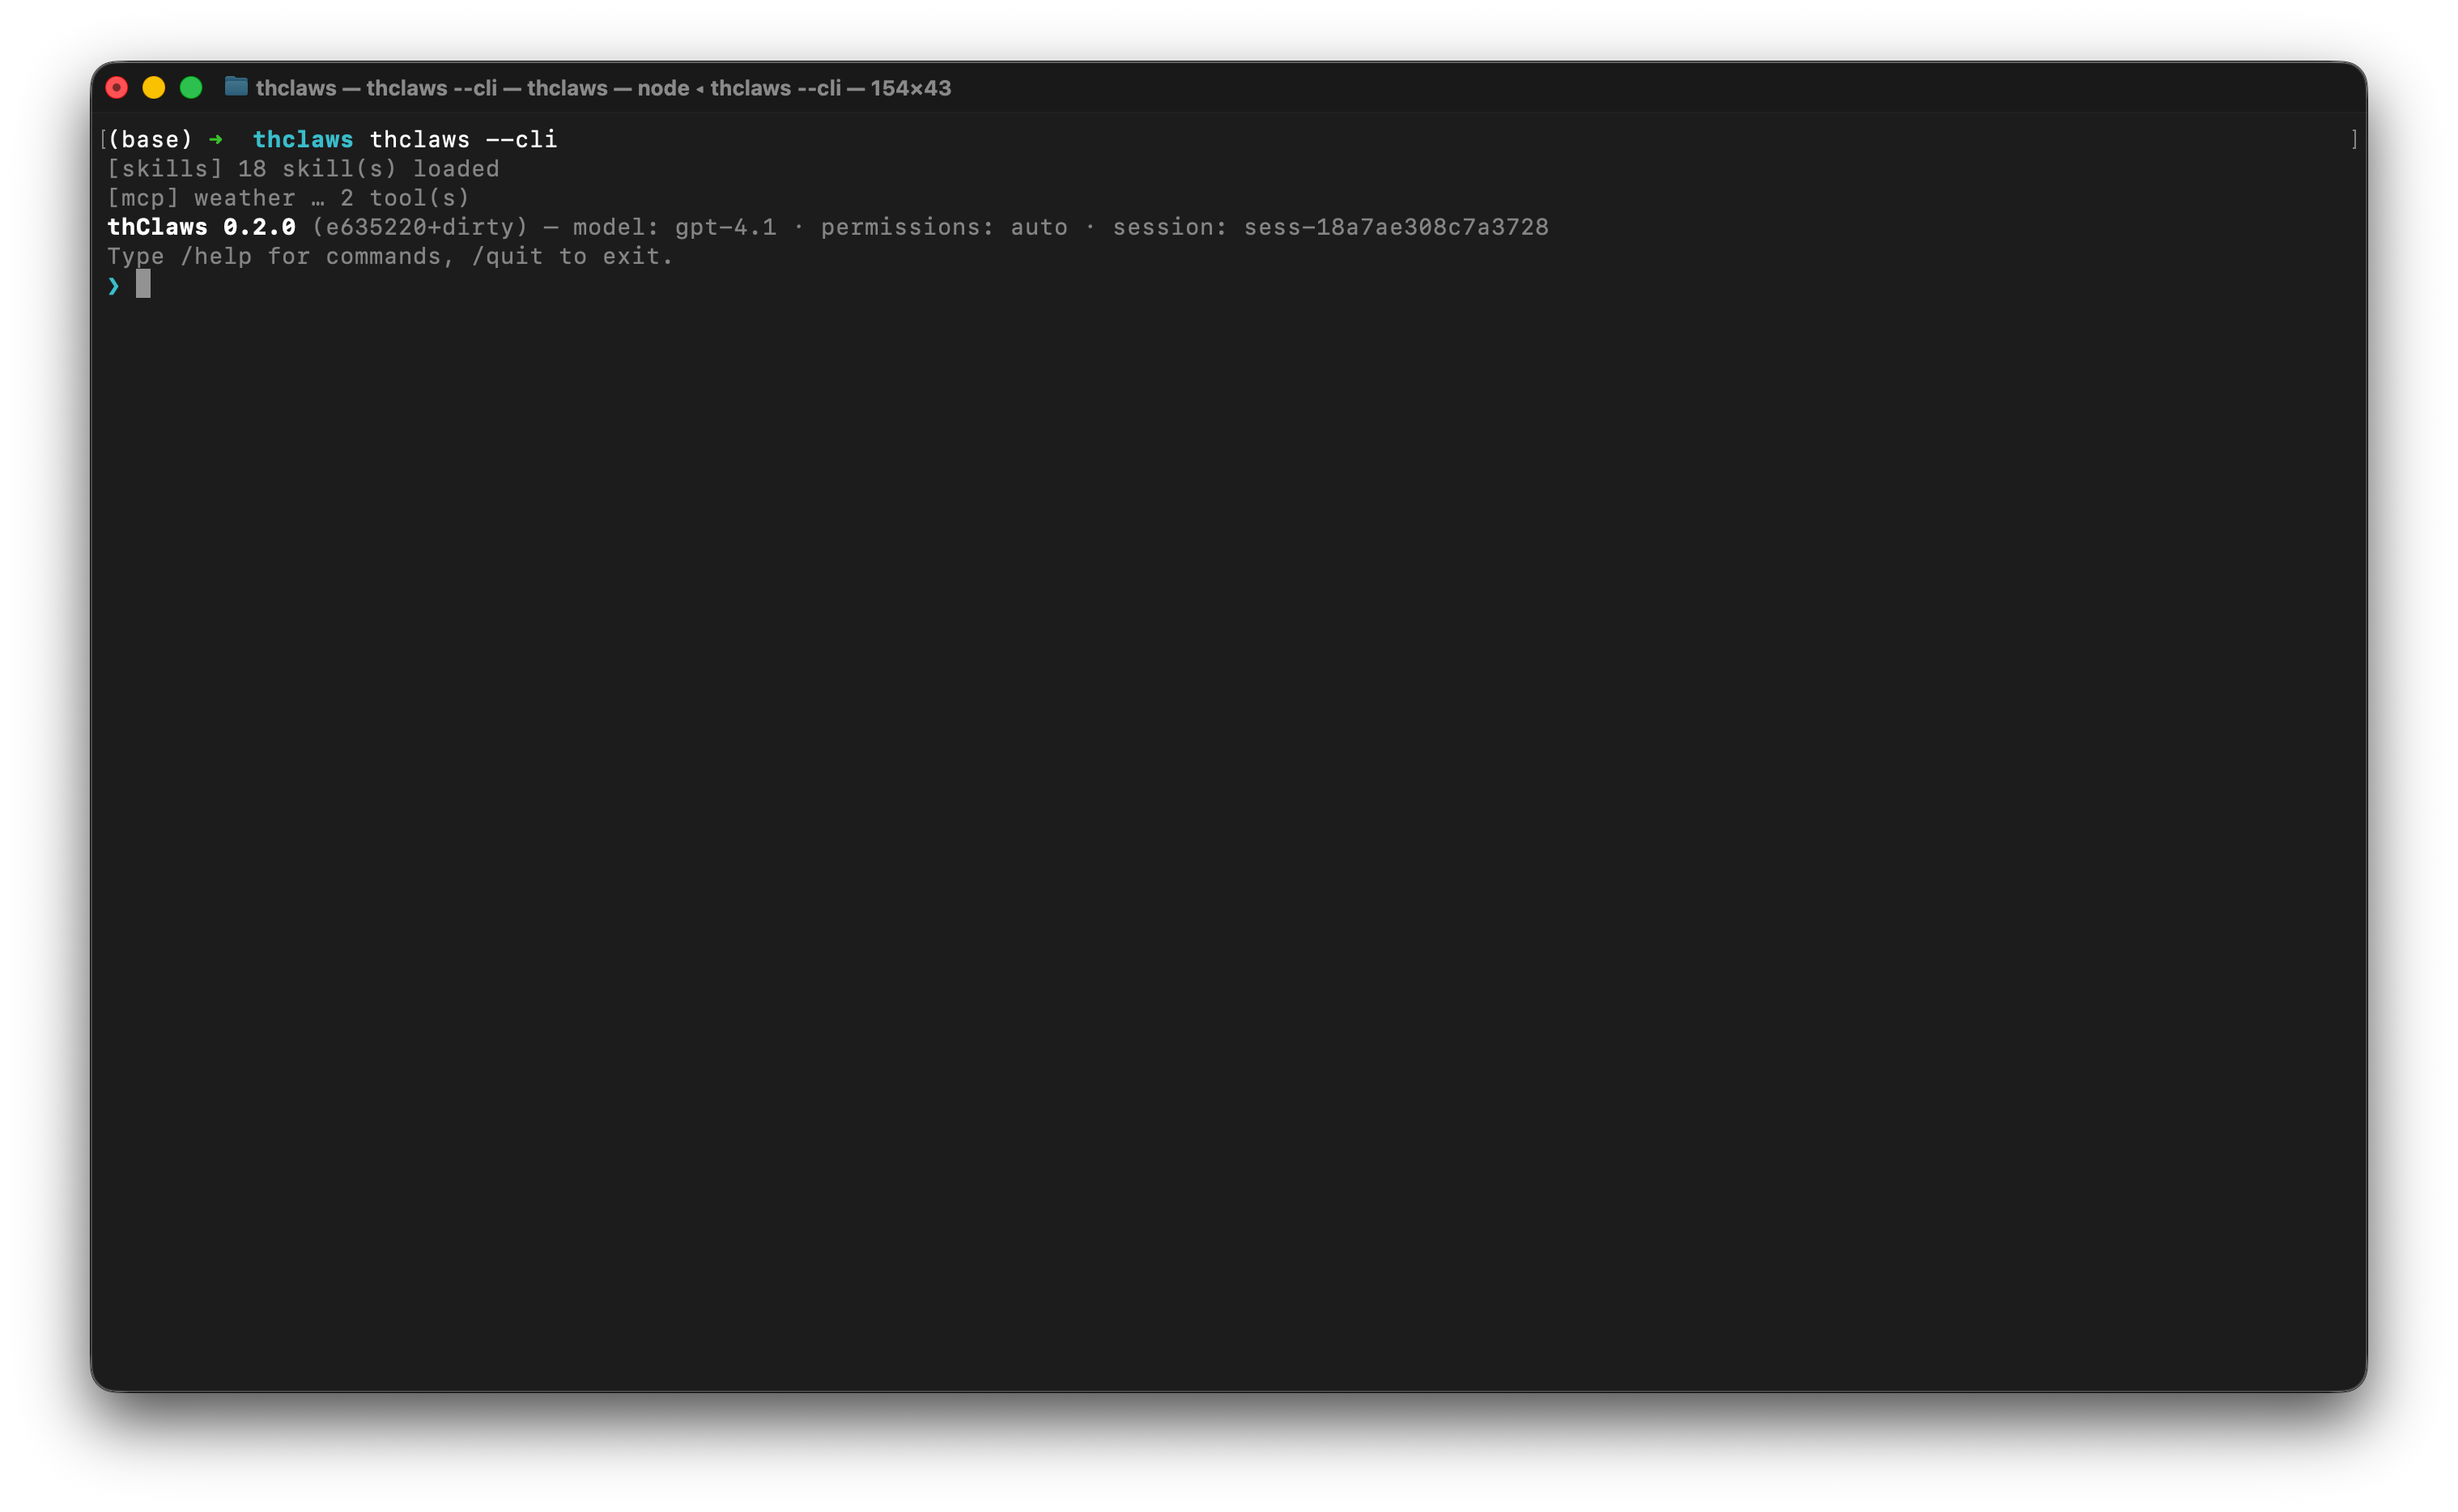
CLI แบบโต้ตอบ
thclaws --cli
agent ตัวเดียวกัน เพียงแต่อยู่ใน terminal ทุกฟีเจอร์ในคู่มือเล่มนี้ ใช้งานได้ที่นี่ — เพราะนี่คือกระดูกสันหลังที่ GUI ห่อหุ้มไว้นั่นเอง
ภายใน REPL บรรทัดที่คุณพิมพ์จะถูกแบ่งออกเป็นสามประเภท:
| Prefix | เกิดอะไรขึ้น |
|---|---|
/<name> [args] |
Slash command — มีในตัว หรือเป็น skill / legacy command (ดูบทที่ 10) |
! <shell cmd> |
Shell escape — รันใน terminal ของคุณโดยตรง ข้าม agent ทั้งหมด (ไม่เสีย token ไม่ต้อง approve) |
| อย่างอื่น | ส่งให้โมเดลในรูปของ user prompt |
Shell escape เหมาะมากสำหรับเช็คอะไรเร็ว ๆ ในระหว่างทำงาน:
❯ ! git status
On branch main
nothing to commit, working tree clean
❯ ! ls src
main.rs  lib.rs  config.rs
❯ now add a new module `auth.rs` based on config.rs
[tool: Read: src/config.rs] ✓
...
prefix เดียวกันนี้ใช้ได้ในแท็บ Terminal ของ desktop GUI ด้วย
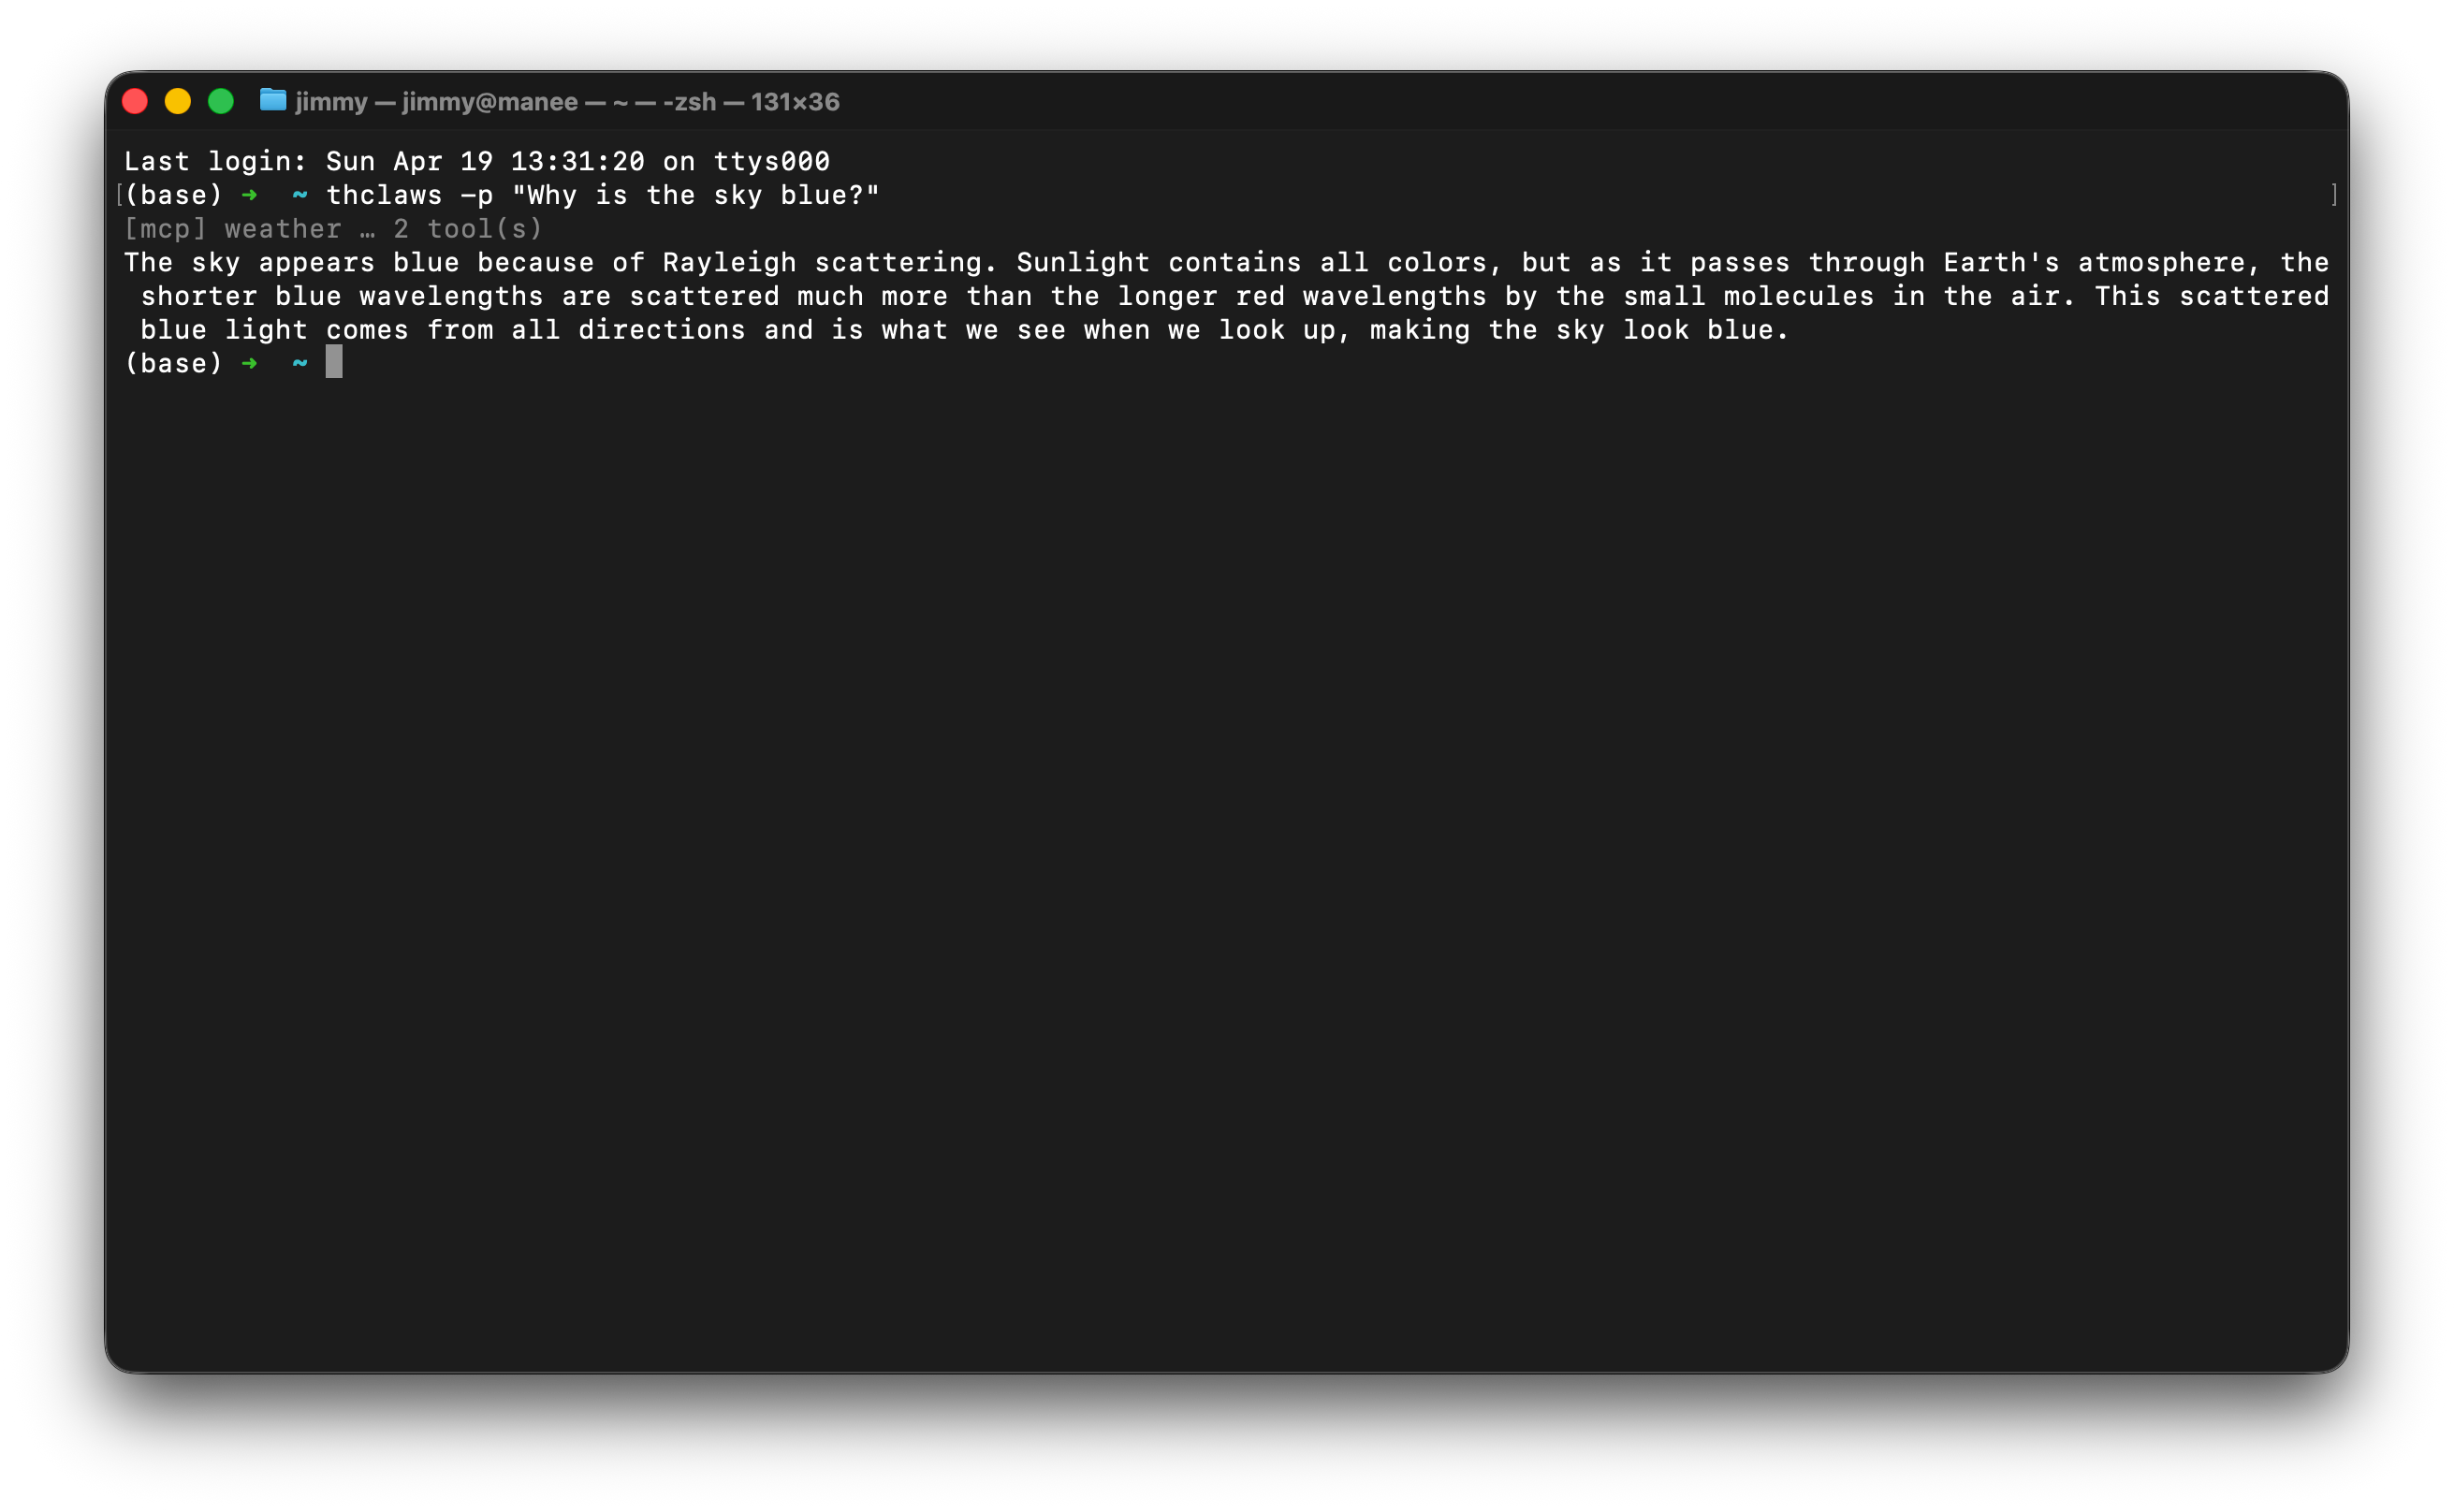
One-shot -p / --print
thclaws -p "What does src/main.rs do?"
thclaws --print "What does src/main.rs do?"    # equivalent long form
รันหนึ่ง turn สตรีมคำตอบออกมา แล้วออกจากโปรแกรม มีประโยชน์ใน CI, git hook หรือ pipeline ของ shell:
git diff | thclaws -p "summarise this diff for a commit message"
ตั้งแต่ v0.88.0 -p เป็น headless แบบ เต็มความสามารถ — เท่า CLI
แบบโต้ตอบ แค่ทีละหนึ่ง turn:
- Session ถูกบันทึก ลง store ของ workspace
(
.thclaws/state/sessions/) และ--resume <id|last>ต่อบทสนทนาเดิม พร้อม history ครบ:
bash
  thclaws -p "จำไว้: โค้ดเนมของ release คือ Falcon"
  thclaws -p --resume last "โค้ดเนมของ release คืออะไร"   # → Falcon
ใส่ --no-session ถ้าอยากได้พฤติกรรมเก่า (ไม่ทิ้งไฟล์) สำหรับ
script แบบ one-shot
- Subagent ใช้งานได้ — Task tool ถูก register แล้ว prompt ที่ต้อง
fan-out (pipeline วิจัย, WorkflowRun, งานหลายบทบาท) ทำงานเหมือนบน
GUI/CLI แทนที่ model จะ role-play ทุกบทบาทเองใน context เดียว
- Hooks ทำงาน — hooks ใน settings.json ชุดเดียวกับทุกโหมด
(ดูบทที่ 13)
บรรทัดสถานะ ([session] saved …, tool trace) ออกทาง stderr —
stdout ยังเป็นคำตอบสะอาดๆ pipe ได้เหมือนเดิม
chain ของ --resume นี้คือกลไกเบื้องหลัง heartbeat schedule —
งานประจำที่ต่อบทสนทนาเดียวโตขึ้นเรื่อยๆ แทนที่จะเริ่มจากศูนย์ทุกครั้ง
ดูบทที่ 19
--serve (HTTP/WebSocket server)
thclaws --serve                       # listen on 127.0.0.1:8443
thclaws --serve --port 7878           # custom port
thclaws --serve --bind 0.0.0.0        # bind all interfaces (auth required)
thclaws --serve --gui                 # plus open desktop window on same engine
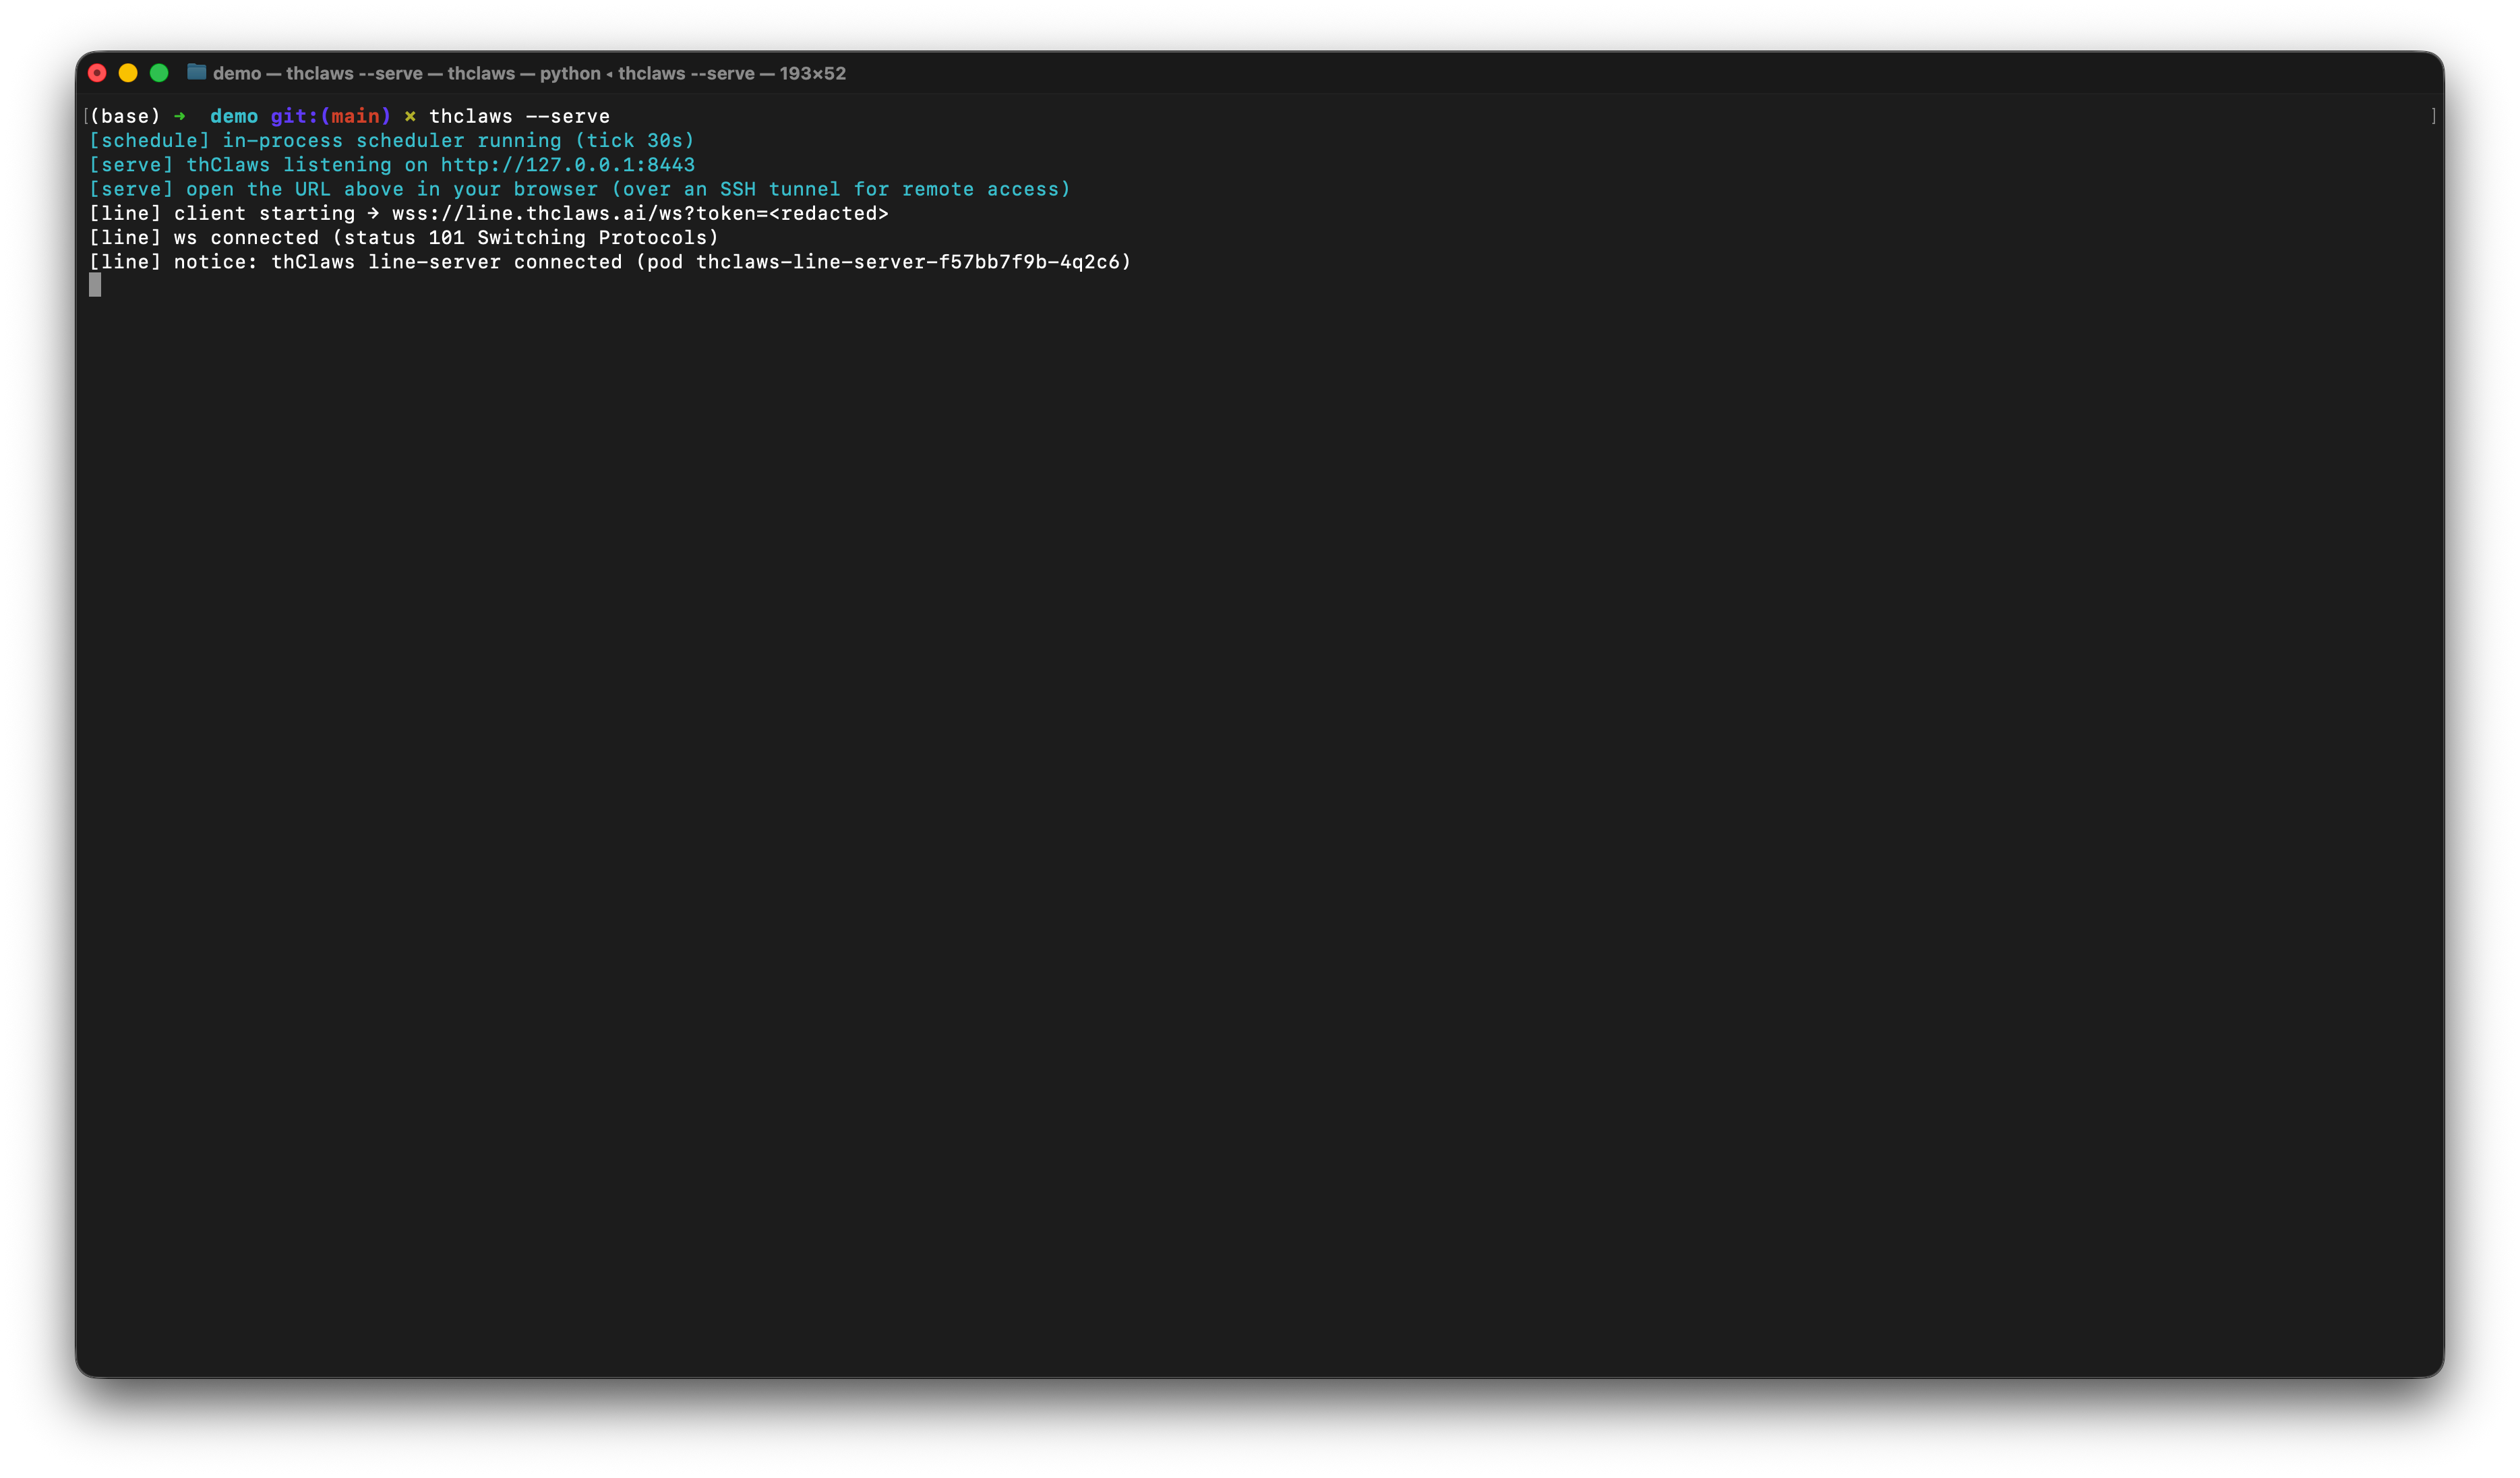
engine ตัวเดียวกันถูก expose ผ่าน HTTP + WebSocket — เปิดได้สอง use case:
- Webapp surface — เปิดเบราว์เซอร์ไปที่
http://127.0.0.1:8443/จะได้ React frontend ตัวเดียวกับ GUI หน้าเดียวกัน เหมาะกับ remote access ผ่าน SSH tunnel หรือ Cloudflare Tunnel (ไม่ต้อง เปิด port ออกสาธารณะ) - AI Agent (API Server) surface —
--serveมาพร้อม/v1/chat/completions(OpenAI-compatible — ให้ Cursor, Aider, n8n, openai-python เรียกใช้ได้เลย) และ/agent/run+/v1/agent/info(thClaws-native สำหรับ orchestrator เช่น thcompany หรือ Paperclip) — agent ตัวเดียวให้บริการได้ทั้งคน และซอฟต์แวร์พร้อมกัน
ค่าเริ่มต้น bind ที่ 127.0.0.1 เท่านั้น (single-user, localhost
loopback) ถ้าจะเปิดกว้างใช้ --bind 0.0.0.0 แล้ว set
THCLAWS_API_TOKEN ในสิ่งแวดล้อม — request ทุก request ต้องมี
header Authorization: Bearer <token> ไม่งั้น 401
--serve กับ --cli / --print ใช้ร่วมกันไม่ได้ (mutually
exclusive) แต่ใช้ร่วมกับ --gui ได้ — desktop window กับ
browser tab จะ attach session เดียวกัน ดูบทที่ 21
สำหรับ LINE / browser bridge ที่ build บน --serve
Flag ที่ใช้บ่อย
    --cli                    run the CLI REPL instead of the GUI
-p, --print                  non-interactive: run prompt and exit (implies --cli)
    --serve                  expose engine over HTTP/WebSocket (default bind 127.0.0.1:8443)
    --port N                 port for --serve mode (default 8443)
    --bind ADDR              bind address for --serve (default 127.0.0.1; 0.0.0.0 needs auth)
    --gui                    open desktop window (compose with --serve to attach to same engine)
-m, --model MODEL            override the model (e.g. claude-sonnet-4-6, moonshot/kimi-k2.6)
    --accept-all             auto-approve every tool call (dangerous — see ch5)
    --permission-mode MODE   auto | ask
    --max-iterations N       max agent loop iterations per turn (0 = unlimited, default 200)
    --resume ID              resume a saved session ("last" for most recent)
    --system-prompt TEXT     override the system prompt entirely
    --allowed-tools LIST     comma-separated tool allowlist
    --disallowed-tools LIST  comma-separated tool denylist
    --verbose                extra diagnostic output
Session
ทุก turn จะถูกบันทึกอัตโนมัติลงไฟล์ ./.thclaws/sessions/<id>.jsonl
Session จะ ผูกกับโปรเจกต์ — เมื่อคุณเริ่ม thClaws ใน directory ใหม่
ก็จะเจอรายการ session ที่ยังว่างเปล่า
ดูบทที่ 7 สำหรับคำสั่งครบชุด (/save, /load,
/rename, /sessions, --resume) รูปแบบการเก็บไฟล์บน disk และวิธีที่
session โต้ตอบกับการเปลี่ยน provider / model
ใน .thclaws/ มีอะไรบ้าง
root ของ sandbox ยังใช้เก็บ config และ runtime state ระดับโปรเจกต์ด้วย:
.thclaws/
├── settings.json     project config (model, permissions, tool lists, kms.active)
├── mcp.json          project MCP servers
├── agents/           agent definitions (*.md)
├── skills/           installed skills
├── commands/         legacy prompt-template slash commands
├── plugins/          installed plugin bundles
├── plugins.json      plugin registry (project scope)
├── prompt/           prompt overrides
├── sessions/         session history — see Chapter 7
├── memory/           MEMORY.md + per-topic memory files — see Chapter 8
├── kms/              project-scope knowledge bases — see Chapter 9
├── rules/            extra *.md rules injected into the system prompt
├── AGENTS.md         project-level agent instructions
└── team/             Agent Teams runtime state — see Chapter 17
เช็คพวกนี้เข้า git เพื่อแชร์กับทีมได้ แต่ควรใส่ .thclaws/sessions/
และ .thclaws/team/ ไว้ใน .gitignore เพราะทั้งคู่เป็น runtime state
ส่วนของระดับผู้ใช้ทั้งระบบจะอยู่ใต้ ~/.config/thclaws/ (และมี
~/.claude/ เป็น fallback ของ Claude Code)
settings.json reference
runtime toggle ทั้งหมดอยู่รวมกันในไฟล์ JSON ไฟล์เดียว โหลดตามลำดับ ความสำคัญ:
- CLI flag (สูงสุด)
.thclaws/settings.json(ระดับโปรเจกต์ — commit ลง repo ได้)~/.config/thclaws/settings.json(ระดับผู้ใช้ทั้งระบบ)~/.claude/settings.json(fallback ของ Claude Code)- compile-time default ใน binary (ต่ำสุด)
settings.json ไม่เก็บ API key — key อยู่ใน OS keychain หรือไฟล์
.env ตามที่คุณเลือกตอนเปิดใช้ครั้งแรก (ดูข้างบน)
ครั้งแรกที่เปิด thClaws ในโปรเจกต์ใหม่ จะ bootstrap ไฟล์ template
ที่ list ทุก field พร้อม default ไว้ให้ — เปิด .thclaws/settings.json
แล้วแก้ค่าตามต้องการ ลบ field หรือเซ็ตเป็น null คือใช้ default
Model + การคุม turn
| Key | Type | Default | ดูเพิ่ม |
|---|---|---|---|
model |
string | "claude-sonnet-4-6" |
บทที่ 6 |
maxTokens |
number | 32000 |
(max output tokens ต่อ turn) |
maxIterations |
number | 50 |
(cap ของ tool-call loop ต่อ turn) |
thinkingBudget |
number | 10000 |
บทที่ 6 (Anthropic extended-thinking) |
searchEngine |
string | "auto" |
(auto / tavily / brave / serpapi / duckduckgo) |
Permissions + tools
| Key | Type | Default | ดูเพิ่ม |
|---|---|---|---|
permissions |
"auto" / "ask" หรือ {allow, deny} |
"auto" |
บทที่ 5 |
allowedTools |
string[] | null |
บทที่ 5 |
disallowedTools |
string[] | null |
บทที่ 5 |
Knowledge bases + memory
| Key | Type | Default | ดูเพิ่ม |
|---|---|---|---|
kms |
{active: string[]} |
{active: []} |
บทที่ 9 |
autoLearn |
bool | false |
บทที่ 9 §Self-improving |
autoLearnKms |
string | "self_learn" |
บทที่ 9 §Self-improving |
autoLearnReconcileHours |
number | 6 |
บทที่ 9 §Self-improving |
Plan mode + skills + subagents
| Key | Type | Default | ดูเพิ่ม |
|---|---|---|---|
planContextStrategy |
"compact" / "clear" |
"compact" |
บทที่ 18 |
skillsListingStrategy |
"full" / "names-only" / "discover-tool-only" |
"full" |
บทที่ 12 |
extract_save_skill_models |
string / string[] | null |
บทที่ 12 (override built-in skill model) |
translator_subagent_model |
string | null |
บทที่ 15 |
Agent Teams
| Key | Type | Default | ดูเพิ่ม |
|---|---|---|---|
teamEnabled |
bool | false |
บทที่ 17 |
Provider routing
| Key | Type | Default | ดูเพิ่ม |
|---|---|---|---|
openrouterFreeOnly |
bool | false |
บทที่ 6 |
gatewayUseFor |
string[] | [] |
บทที่ 6 (เช่น ["openai", "anthropic"]) |
GUI
| Key | Type | Default | ดูเพิ่ม |
|---|---|---|---|
windowWidth |
number | null (auto จาก monitor) |
บทที่ 4 |
windowHeight |
number | null (auto จาก monitor) |
บทที่ 4 |
guiScale |
number | null (1.0) |
บทที่ 4 (clamp 0.5–3.0) |
showRawResponse |
bool | false |
(debug: dump raw text ของ assistant ลง stderr) |
ไฟล์พี่น้องของ settings.json
settings ที่ schema ใหญ่หรือเปลี่ยนบ่อยอยู่แยกไฟล์ ไม่ปนใน
settings.json:
.thclaws/mcp.json— registry ของ MCP server ที่จะ spawn ตอน start (รูปแบบ{"mcpServers": {...}}เดียวกับที่ Claude Code ใช้) — ดูบทที่ 14.thclaws/hooks/<event>.sh— shell script รัน lifecycle event 8 ตัว (pre_tool_use, post_tool_use, session_start ฯลฯ) — ดูบทที่ 13.thclaws/AGENTS.mdหรือCLAUDE.md— instruction ระดับ โปรเจกต์ที่ฉีดเข้า system prompt — ดูบทที่ 8.envในโปรเจกต์ หรือ OS keychain — API key (ไม่อยู่ใน settings.json) — ดูบทที่ 6
ตัวอย่าง
{
  "model": "claude-sonnet-4-6",
  "permissions": "auto",
  "maxTokens": 32000,
  "maxIterations": 50,
  "thinkingBudget": 10000,
  "searchEngine": "auto",
  "planContextStrategy": "compact",
  "skillsListingStrategy": "full",
  "kms": { "active": ["project-notes"] },
  "autoLearn": true,
  "openrouterFreeOnly": false,
  "gatewayUseFor": [],
  "teamEnabled": false,
  "windowWidth": null,
  "windowHeight": null,
  "guiScale": null
}